The moment a first-time RV camper pulls into a full-hookup site and looks at the pedestal, one of two things happens: they figure it out by trial and error, or they call someone in a panic. After four years of full-time RV travel and helping a lot of fellow campers untangle their shore power situations, I want to make sure you are in the first category — ideally without the error part.
This guide covers the three utility hookups you will encounter at RV campgrounds: electric, water, and sewer. What each one means, how to connect correctly, what can go wrong, and what gear you actually need.
Understanding RV Campground Site Types
Before diving into hookup specifics, it helps to understand the terminology campgrounds use to describe their sites.
Full Hookup — Electric, water, and sewer connections available at the site. The most convenient option and the most expensive. Common at private campgrounds and some state park RV areas.
Partial Hookup (Water and Electric) — No sewer at the site. You use your holding tanks and dump at the campground dump station when they fill. Very common at national park campgrounds and many state parks.
Electric Only — Just power. You manage your own water from tank and use the dump station. Least common in dedicated RV areas but found in some campgrounds that cater to both tent and RV campers.
Dry Camp / No Hookups — No utilities at the site. You run entirely off your tank water, batteries (or generator), and dump elsewhere. Common in national forests, BLM land, and the primitive sections of many campgrounds.
Understanding what you are booking matters because it determines what you need to prepare.
Electric Hookups: 30-Amp vs 50-Amp
The most critical hookup to get right is power. Getting it wrong can damage your RV’s electrical system or cause a fire.
Amperage Basics
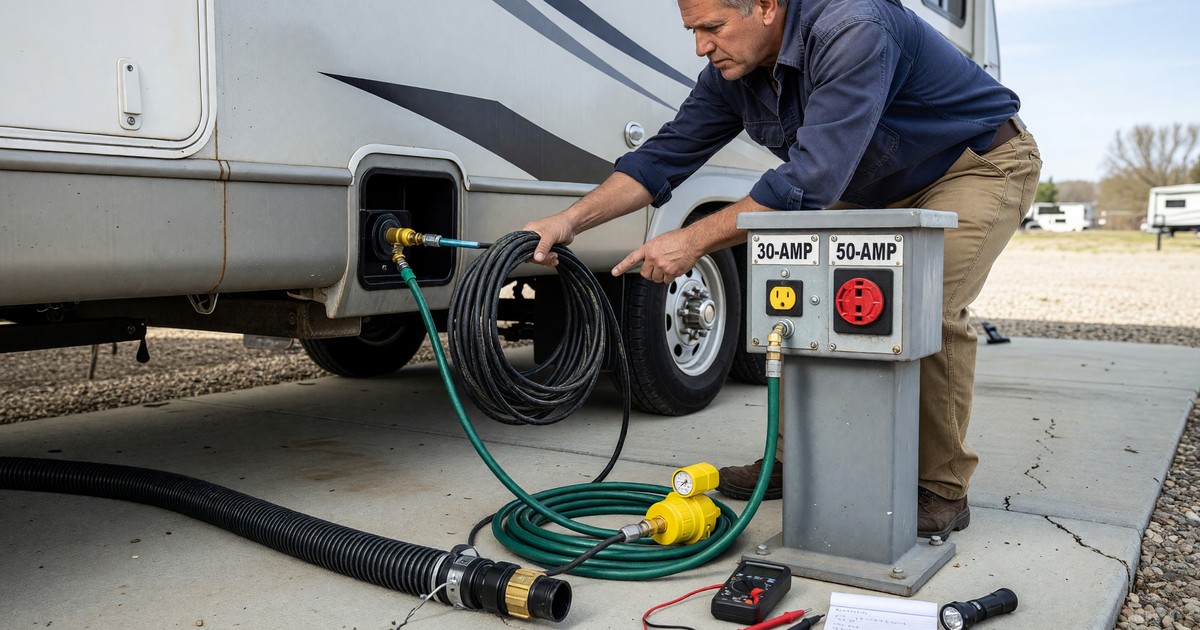
RV campground pedestals come in three configurations:
- 20-amp (standard household outlet, NEMA 5-20 or 5-15) — Only useful for small trailers and tent campers charging devices. Most RVs cannot run on 20-amp service.
- 30-amp (NEMA TT-30) — A three-prong outlet delivering 120 volts at 30 amps, for a maximum of 3,600 watts. This is the standard for most travel trailers, fifth wheels under 35 feet, and older Class A motorhomes.
- 50-amp (NEMA 14-50) — A four-prong outlet delivering 240 volts across two legs, each rated at 50 amps, for a maximum of 24,000 watts. Required for large Class A motorhomes and any RV with two air conditioners.
Your RV’s shore power cord tells you what it needs. A 30-amp cord has three prongs. A 50-amp cord has four. Adapters exist to connect mismatched service, with some important limitations.
Adapters: What Works and What Doesn’t
30-amp RV on 50-amp pedestal — Works fine using a 50-amp-to-30-amp dogbone adapter. You simply use less of the available power. No issues.
50-amp RV on 30-amp pedestal — Works with a 30-amp-to-50-amp adapter but you are limited to 3,600 watts total. If your coach has two air conditioners, you cannot run both. In hot weather, this means choosing between AC and other high-draw appliances (microwave, electric water heater, hair dryer). Many 50-amp rigs manage fine at 30-amp service if you are mindful.
50-amp RV on 20-amp household outlet — Only for emergency use. You can typically run lights and charge devices but not AC or any major appliance.
Surge Protectors and Voltage Regulators
Do not plug your RV into campground power without a surge protector. Campground pedestals vary widely in quality, and some have wiring problems that can feed incorrect voltage to your coach. A surge protector (basic) or an Electrical Management System / EMS (full protection) sits between the pedestal and your shore power cord.
An EMS monitors incoming voltage continuously and disconnects if voltage drops below or rises above acceptable limits. They also check for reverse polarity and open grounds. For any RV worth more than a few thousand dollars, an EMS is not optional equipment — it is insurance.
Checking Pedestal Quality
Before plugging in, visually check the pedestal:
- Is the outlet face intact with no cracked or melted plastic?
- Does the outlet fit your plug snugly, or is it loose and worn?
- Is there any visible corrosion inside the outlet?
If anything looks wrong, tell the campground office and ask for a different site. Some campgrounds (particularly older private parks) have pedestals that have not been serviced in years.
Water Hookups: Pressure and Filtration
City water hookups at campgrounds deliver pressurized water directly from the campground’s municipal supply or well. You connect a hose from the pedestal spigot to your RV’s city water inlet.
Pressure Regulators Are Not Optional
Campground water pressure varies from 40 PSI to over 100 PSI. Most RV water systems are rated for 40-60 PSI. Sustained high pressure stresses fittings, damages your water pump bypass valves, and can blow connections loose inside the coach walls. A failed fitting inside a wall is an expensive repair.
A water pressure regulator ($10-30) threads onto the spigot before your hose. Get one with a gauge so you can see actual pressure. Set it to 45-55 PSI and leave it there.
Drinking Water Hoses
Use a dedicated white or blue potable water hose for your hookup, not a standard garden hose. Standard garden hoses are made with plastics and brass fittings that leach compounds you do not want in your drinking water. Potable water hoses are specifically manufactured for drinking water applications. They are available at any RV supply store and most hardware stores.
Filtration
Campground water quality varies. Some parks are on excellent municipal systems. Others are on older wells or systems with aging infrastructure. An inline water filter at the connection point catches sediment and improves taste. A dedicated RV water filter canister ($30-60) with a replaceable carbon block filter is a practical upgrade if you camp regularly.
If you are at all uncertain about water quality, use your onboard tank water for drinking and the city hookup for showers and dishes.
When Not to Use the City Hookup
In freezing temperatures, a connected water hose will freeze and may burst or damage your inlet fitting. Disconnect the hose when overnight temps drop below 32°F, drain it, and rely on your onboard fresh water tank (with your tank heaters running if your coach has them).
Sewer Hookups: The Part Nobody Talks About Enough
Sewer connections at full-hookup sites let you drain your holding tanks directly into the campground’s sewer system — but there is a right way and a wrong way to do it, and the wrong way creates problems.
Which Valve Opens First
Your RV has at minimum two holding tanks: grey water (sinks and shower) and black water (toilet). Always drain black first, grey second. The grey water flushes residue through the sewer hose, cleaning it before you disconnect.
Never leave the black tank valve open while connected. A common mistake — especially for long-term stays — is leaving both valves open at all times so the tanks never fill. With the black tank valve permanently open, solids accumulate at the bottom of the tank while liquid drains away continuously. The result is a pyramid of waste that will not flush out. Always let the black tank fill to at least two-thirds before draining.
Sewer Hose Setup
A standard 3-inch sewer hose connects your RV’s drain outlet to the campground’s sewer inlet. Use a hose that seals properly at both ends — the bayonet connector at the RV and a threaded or bayonet connection at the pedestal’s sewer inlet ring.
Support the hose so it runs continuously downhill from your RV to the pedestal. Sagging low points in the hose create liquid pools that reduce flow and increase the chance of spillage when you disconnect. Sewer hose support slinkies ($15-25) thread onto the hose to hold the correct pitch.
Use latex or nitrile gloves every time you handle sewer connections. Wash your hands when done. This sounds obvious but lapses happen, especially on the 10th camping trip.
Tank Treatments
Holding tank treatments reduce odor and help break down waste. Enzyme-based treatments (rather than formaldehyde-based products, which are banned at some campgrounds) are the better choice for the black tank. Add treatment after each dump, along with a few gallons of water to keep things moving.
Setting Up a Full Hookup Site: Sequence
When you pull into a full hookup site, the efficient setup sequence is:
- Level the coach and deploy slides
- Connect electric (with EMS/surge protector) — start here because your fridge, AC, and other systems want power
- Connect water (with pressure regulator and filter)
- Connect sewer hose, keep both valves closed until needed
- Run a brief check: confirm voltage is in range on your EMS display, check for water pressure at a faucet inside, confirm the sewer connection is secure
Disconnect in reverse order: sewer first (dump tanks), then water, then electric.
What to Carry in Your Hookup Kit
Every RV should have a dedicated hookup kit with:
- EMS or surge protector (30-amp or 50-amp as appropriate)
- 30-to-50-amp dogbone adapter (or 50-to-30, depending on your rig)
- 20-amp adapter (emergency use)
- 25-30 foot potable water hose
- Water pressure regulator with gauge
- Inline water filter
- 20-foot sewer hose with additional 10-foot extension
- Sewer hose support
- Rubber gloves (several pairs)
- Teflon tape for water connection threads
This kit fits in a small milk crate or a dedicated storage compartment. Keep it separate from other gear so it is always accessible and ready.
For more on choosing campgrounds that work for RV trips, see our guide to booking state park campsites and campgrounds near national parks. For backing your RV into the site before connecting hookups, see our guide to backing an RV into a campsite.
Frequently Asked Questions
What is the difference between 30-amp and 50-amp RV service? 30-amp service (NEMA TT-30) provides 120 volts at 30 amps for a maximum of 3,600 watts. 50-amp service (NEMA 14-50) provides 240 volts across two 50-amp legs for a maximum of 24,000 watts. Most travel trailers use 30-amp service; large Class A motorhomes and any RV with two air conditioners typically require 50-amp.
Do I need a water pressure regulator for RV campground hookups? Yes. Campground water pressure can exceed 100 PSI, well above the 40-60 PSI most RV water systems are rated for. A pressure regulator (cost: $10-30) prevents damage to fittings, hoses, and your water pump bypass valves. It is essential equipment for any RV hookup.
Should I leave my RV black tank valve open at a full hookup site? No. Leaving the black tank valve permanently open causes solids to accumulate at the tank bottom while liquids drain away — called a pyramid plug — that is difficult and unpleasant to clear. Always let your black tank fill to at least two-thirds capacity before draining, then follow with the grey tank.
Can I use a regular garden hose for my RV water hookup? No. Standard garden hoses are made with materials not rated for potable water and can leach contaminants into your water supply. Use a dedicated white or blue potable water hose specifically manufactured for drinking water applications.
What is an RV surge protector and do I need one? An RV surge protector or Electrical Management System (EMS) sits between the campground pedestal and your shore power cord. It protects against voltage spikes, low voltage, reverse polarity, and open grounds — all problems found at campground pedestals. For any RV with significant electrical components, an EMS is considered essential protection.