A cracked water line in an RV costs between $200 and $2,000 to repair depending on where the line runs and how accessible it is. A cracked pump is another $100-300. A water heater that freezes and splits is $400-800 plus installation. All of these failures share a single cause: water left in the system that froze, expanded, and damaged whatever was containing it.
Proper winterization takes 30-60 minutes and prevents every one of those failures. The procedure varies slightly depending on whether you blow out your lines with compressed air or use antifreeze, but the sequence of steps follows the same logic: drain every water-holding component and then either blow out or antifreeze the lines.
When to Winterize
Winterize before any period during which nighttime temperatures will drop below 32°F, even briefly. Sustained freezing is not required for damage — a single overnight freeze is enough to crack a fitting or split a tank.
For RVs in active use through shoulder seasons, the practical guideline is this: if the forecast shows overnight lows below 35°F at any location along your travel route or at your storage location, winterize before parking it for any period longer than a day or two. A 35°F margin above freezing is not comfort — it is buffer for forecast error and insulation inefficiency.
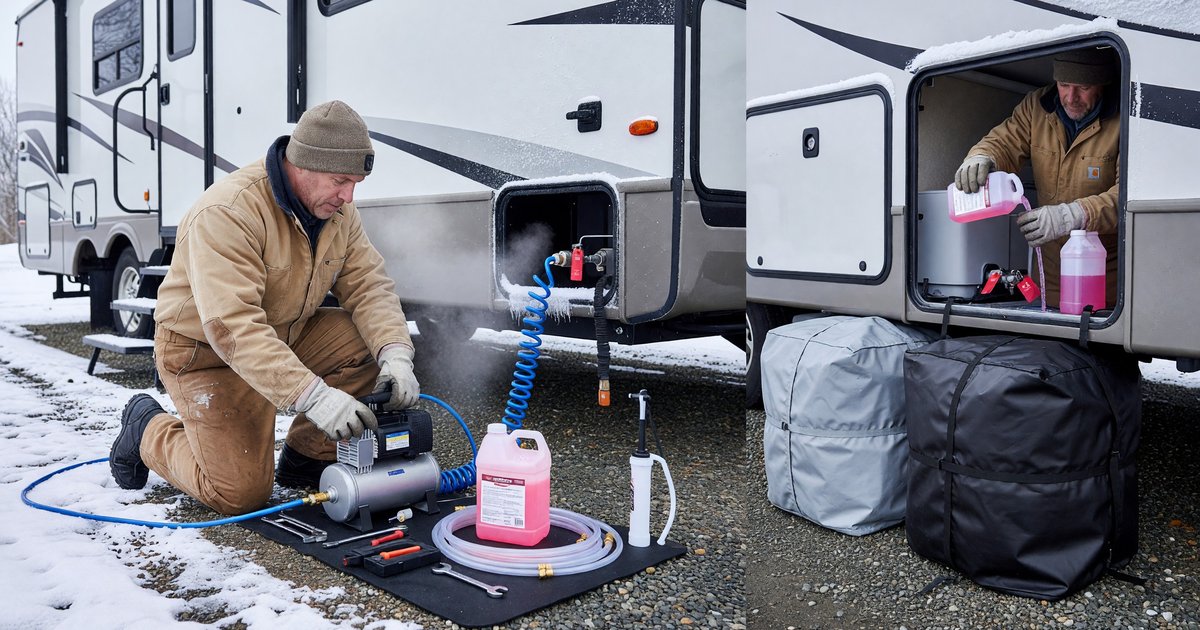
The Two Winterization Methods
Method 1: Blow out with compressed air. A small compressor with an RV blow-out plug (available at RV supply stores for $8-15) connects to the city water inlet. Air pressure (max 50 PSI — do not exceed this) blows residual water out of each line and fixture. This method leaves no antifreeze in the system and is preferred by campers who do not want to flush antifreeze out in spring. The limitation: air cannot reach water in traps (sink and shower P-traps) effectively. Hand-add antifreeze to P-traps separately.
Method 2: Antifreeze pump through. RV-specific non-toxic antifreeze (pink antifreeze rated to -50°F, NOT the automotive green stuff) is pumped through the entire water system until it appears at each fixture. This method covers all lines, traps, and fixtures completely. The limitation: you use 2-4 gallons of antifreeze per RV, and you must flush it out thoroughly in spring before using the water system.
Many experienced RVers combine the methods: blow out the main lines with compressed air, then add antifreeze to the P-traps, water heater bypass, and low points by hand.
Step-by-Step Winterization Sequence
This sequence applies to a typical travel trailer or motorhome with a standard water system. Your specific RV may have components in different locations — consult the owner’s manual for your water heater type and any unique fittings.
Step 1: Drain the Fresh Water Tank
Open the fresh water tank drain valve (typically under the RV, may be a petcock or plug). Drain completely. For an accelerated drain, open all faucets while draining to break the vacuum and speed the flow. If the tank has no dedicated drain, run the water pump until the tank empties and the pump starts to cavitate (you will hear it running dry — do not let it run this way for more than a few seconds).
Step 2: Turn Off and Bypass the Water Heater
This step is critical and missed by many first-timers. The water heater must be bypassed before antifreeze is introduced, or you will fill a 6-10 gallon water heater with pink antifreeze — both unnecessary and time-consuming to flush in spring.
Locate the bypass valves for your water heater. A standard bypass kit has two valves on the supply and return lines of the water heater, plus a bypass valve between them. Close the supply and return valves, open the bypass. Now antifreeze flows around the water heater, not through it.
After bypassing, drain the water heater via the drain plug on its exterior panel (a 1-inch anode rod / drain plug). This plug takes a socket wrench and is typically recessed in the panel. Open the T&P relief valve while draining to speed it. Remove and inspect the anode rod — replace if less than 50% of the original material remains.
Step 3: Open All Low-Point Drains
Most RVs have one or two low-point drain valves, typically near the center or rear undercarriage, that drain the lowest points of the water lines. Open these and leave them open while you proceed through the rest of the steps.
Step 4: Blow Out the Lines (if using compressed air method)
Connect the blow-out plug to the city water inlet. Set your compressor to no more than 50 PSI. Open each fixture — starting farthest from the city water inlet and working closer — and blow until only air comes out. Include:
- All cold water faucets (kitchen, bath, outside shower if equipped)
- All hot water faucets (remember, water heater is bypassed — you are blowing the supply lines only)
- Toilet flush valve (hold it open and blow through)
- Outside shower if equipped
- Any icemaker lines
After blowing out, close all fixtures.
Step 5: Add Antifreeze to P-Traps
P-traps (the curved section under sinks and the shower) hold water that air cannot reliably displace. Pour approximately one cup of RV antifreeze directly down each drain — kitchen sink, bathroom sink, shower. This replaces the water in the trap with antifreeze.
If using the antifreeze pump-through method rather than air, the pump-through will handle the traps when you run antifreeze through each hot and cold fixture.
Step 6: Antifreeze the Toilet
Pour one cup of RV antifreeze directly into the toilet bowl to protect the blade seal. Flush once so antifreeze enters the black tank holding area around the valve.
Step 7: Protect the Water Pump
If using antifreeze pump-through: the pump draws antifreeze from the supply line. Run it until antifreeze appears at all fixtures.
If using blow-out method: disconnect the pump’s inlet line from the fresh water tank, pour a small amount of antifreeze into the inlet line, and briefly run the pump to move antifreeze through the pump head. This protects the pump’s internal components from any residual moisture.
Step 8: Exterior Connections and Accessories
- Disconnect city water hose and store
- Remove water filter cartridges (blow out the canister or leave open to drain and dry)
- If your RV has an icemaker: follow manufacturer winterization instructions for the specific unit
- If your RV has an on-demand water heater: consult the manufacturer’s guide — these require different winterization than tank water heaters
- Close all low-point drain valves once drainage is complete
Step 9: Record What You Did
Note the date of winterization, the method used, and any components that needed attention. This is useful both for your own spring-startup checklist and for any future service or warranty work.
Spring De-Winterization
Before using the water system in spring: flush all antifreeze through every fixture until the water runs clear and the antifreeze color is gone. Reinstall the water heater anode rod (or a new one). Fill the fresh water tank. Reconnect the water heater to the non-bypass configuration. Check all connections for leaks under pressure before extended use.
For campground-specific information on hookup connections at your destination, see our complete guide to RV campground hookups.
Frequently Asked Questions
When should I winterize my RV? Winterize before any period during which nighttime temperatures at your storage or travel location will drop below 32°F. A practical guideline is when overnight lows are forecast below 35°F. A single overnight freeze is enough to crack water lines or fittings.
What kind of antifreeze do I use to winterize an RV? Use RV-specific non-toxic pink antifreeze rated to -50°F. Never use automotive antifreeze (green or orange varieties), which is toxic. RV antifreeze is propylene glycol-based and rated for potable water system use.
Do I need to winterize my RV water heater? Yes. Bypass the water heater using the bypass valve kit before running antifreeze through the lines. Then drain through the exterior drain plug. Remove and inspect the anode rod — replace if significantly depleted.
What is the maximum PSI for blowing out RV water lines? 50 PSI maximum. Exceeding this can damage fittings, seals, and line connections. Use a regulated compressor with pressure verified before connecting.
How do I winterize RV P-traps? Pour approximately one cup of RV non-toxic antifreeze directly down each drain — kitchen sink, bathroom sink, and shower. The antifreeze settles in the P-trap and prevents residual water from freezing.
Further Reading from Authoritative Sources
- RVIA — RV Maintenance and Safety — RVIA consumer guidance on RV water system maintenance and seasonal storage.
- Go RVing — Winterization Guide — Practical step-by-step winterization overview covering air and antifreeze methods.